Friday 23 August 2013

Our Favourite Back to School Free Printables


For book lovers and children who love to read late into the night, we love these wise owls which look as though they've been drawn onto feather. Print out onto card stock.
print your free bookmarks here 


Imagine discovering a little pillow box hidden in a pocket or school bag on your first day back at school. I adore the idea of placing a little special something waiting to be found. Though kids would be delighted in finding sweets I'd much rather pick a new scented rubber or pencil topper, hair tie, bracelet, stickers, a classic bouncy ball.
print it free here


If like me the last week of the summer holidays gets busy with organising, sewing labels onto clothes and hunting for new school shoes then you may be on the lookout for things to keep the kids busy.
I love these vibrant fun bingo cards from misstiina for keeping the kids a little busy. Why not print to take out with you as you  drag  take the kids shoe shopping and they can spot numbers as they go 'bingo' everyone's a winner.
print it free here 

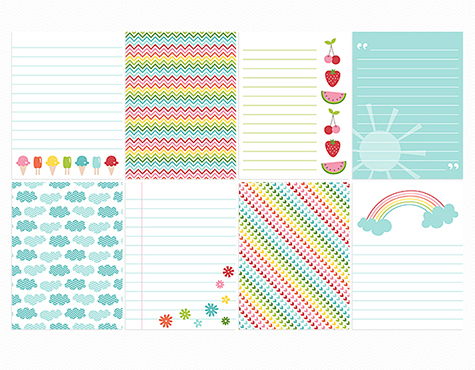
It's never too late to journal the holidays and these note cards are perfect for doing just that. Remembering all the things we've done over the summer, the things that made us happy, new places we've seen, new friends we've made and days we'd like to never forget.
They make beautiful note cards to send to friends too.
print yours for free here


With so many wonderful things on this site here's a little something for us big kids too. With its simple words and gird paper these make great inspiring notecards. They'd make great little cards to post to friends and family too, especially those we've enjoyed our summer days with, with a little memory jotted down.... remember the day when we laughed so hard we..... 
I don't think we write as often as we should to friends and family and I know this will inspire me to do it and hopefully you too.
find your's free to print here


Monday 19 August 2013

Monday Makery - Classic Play Magic Wand


With the Summer holidays almost over we felt we needed a little touch of magic for the final weeks. So, we made our very own personal magic wands. With a snippety snip and a quick little stitch they're ready for casting magic upon the days..... wishing we could make the summer last forever.

Here's what you'll need:

  • fabric, scissors, pencil, star shaped cookie cutters, a doweling stick (we used garden sticks) and glue. If you like you can add ribbons, beads and sequins too.
Here's how:
  1. Draw around your star shaped cookie cutter onto the chosen fabric. Repeat.
  2. Cut out your 2 stars.
  3. With one star on top of the other sew around the edges leaving a small space at the bottom to enable you to stuff it full of magic.
  4. Stuff the star with stuffing - (whisper some magic words as you go) 
  5. Put some glue around the end of your doweling stick and insert into the bottom of the star.
  6. Using clothes pegs, peg the fabric together either side of the doweling stick to hold in place and leave to dry.
  7. Once dry, remove the pegs and sew along the final base to seal the magic inside.


Happy Magical Making
xx

Thursday 15 August 2013

Lucky Bubbles and Dear Friends


Dear friends, pull up a comfy chair, sink into a cosy nook and take a look at our little preview of what's to come from the quirky and fabulous Lucky Boy Sunday. 


With the first ever rug, cosy blankets for both grown ups and little children, fluffy houses (where we suspect little fluffy people dwell), cushions, gift tags, posters and friends of all characters its a collection that journeys deeper into the universe of Camilla and Camilla; the creators, the artists, the minds and vision of Lucky Boy Sunday. This is just the beginning and hey, we've saved you a seat.


The new collection will arrive mid October. If you would like to pre-order please email us at info@sistersguild.com


Sadly the Favourite Place will no longer be available so if you've had your eye on one, now is the time to grab one whilst stock lasts as once they're gone they're gone. 


Tuesday 13 August 2013

Bobo Choses - Junes Lullaby ssssshhhh.......


Bobo Choses has arrived, carried on a breeze from Spain with the sound of a lullaby. A collection full of musical references designed with hand drawn illustrations featuring daddy's guitar and trumpets alongside rain drops, trees, and western style cowboy hats it's a tribute to all the lullabies sung by parents to their children as they fall asleep.

A dreamy collection making the autumn and winter sound and feel like a lullaby


June's Lullaby

Listen to my voice my little June,
The day is ending
Chinese shadows will come to give you company
as I leave the room.
They will change their shape and colour.
Listen to my voice my little June.
The day is ending.
They will make you laugh until you fall asleep.
While you close your eyes, you will say:
This is a guitar, this is a volcano
this is a trumpet, this is my mum
Listen to my voice my little June.
The day is ending
and you still have all night to play.
Tomorrow, if you wish, tell me about it.
But now, goodnight.goodnight...
this is a guitar, this is volcano.
this is trumpet this is my mum
Listen to my vpoice my little June
This is your lullaby song.


                                                   - lyrics by Felipe Cano


take a look at the new collection here


Monday 12 August 2013

Monday Makery - No Sew Bunting


With full summer festival fever coursing through us we gathered our camping gear ready to go, but of course priority wasn't on remembering the essentials in the traditional sense but rather those things that are essential to the festival feel, we needed colour, comfort and something to add a little vibrant feeling of freedom. We needed bunting!
Despite having an entire basket of bunting already we thought we would create our own fun version so here's what we made.


Here's what you'll need:
  • wooden spoon
  • fabric scissors / pinking shears work best so not to fray the edges
  • coloured string / thin rope
  • lots of vibrant fabric coloured or patterned both sides


Here's how:
  1. Cut your fabric into strips about 2cm wide and 40cm in length (this will give each pom pom on the bunting a length of 20cm)
  2. Hang each length over the handle of a wooden spoon making sure the lengths hang roughly equal. 
  3. Using your coloured string or thin rope bunch them together under that spoon handle twist the fabric and tie a knot. Once the knot is secure cut off the extra string length to keep it tidy.
  4. Slide your pom pom bunting off the wooden spoon and put to one side.
  5. Continue with your various coloured fabric until you have as many as you need - this will depend on the length of bunting you want.
  6. Finally when all all the bunting has been prepared slide each looped one onto a thin rope and hang.


You can use the same technique with coloured tissue paper and have the same effect but this is of course a much longer lasting version and can be washed if necessary ready to re-use again and again, changing the colours to suit its decor needs and adding more colours too.

This is a great craft for kids for there's no sewing involved and as long as they're safe with a pair of scissors, can cut in an (almost) straight line then they're all set to go!


Happy Making
xx


London's Goldhawk Road is the best place i've found for fabric. Spoiled for choice with shop after shop bursting with every fabric you can imagine and all for cheaper than i've ever found anywhere else, its a fabric heaven for all crafts big and small.