We are about to throw a party for Sessi to celebrate her 5th Birthday and in all the preparations that include an entertainer, food, party bags and all the hulabaloo that comes with it, my favourite part is the decorations!
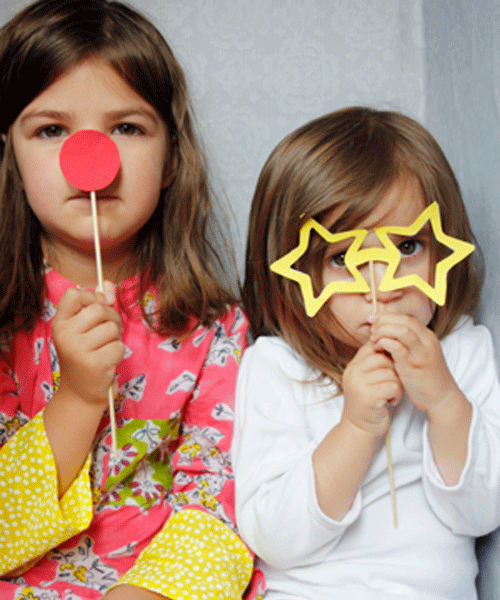
Here we create a photo booth and accessories to capture all her friends in disguise. We know it will cause fits of giggles from all the guests and the photos can be used to make thank you cards later.
I'm going to get my hands on a polaroid camera to snap away and pin all the pictures from the booth onto a board for everyone to see and have an instant memento to take home.
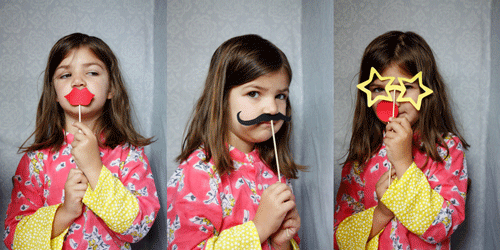
So, first to come up with the accessories and disguises. The simplest way to alter a face is by adding beards, moustaches, glasses, hats and in keeping with the circus theme of the party a clown nose too.
We had so much fun looking at some pretty wacky beards and moustaches and showing pictures of Dame Edna Everidge to Sessi was fun and we recreated said Dame's style of glasses for some instant comical glam.
Here's what you'll need:
- black card
- scissors
- pencil
- wooden sticks - we used wooden barbeque skewers and snipped the sharp end off.
- glue
Here's how :
- Decide what shapes, disguises and accessories you want to make
- Draw them out onto card to create a template and cut each one out, this gave us room for error and perfecting each piece. It's best to fold the card in half and draw one side of the moustache/glasses etc then keep it folded when you cut. This will ensure that there is symmetry.
- The trickiest bit is drawing on the black card as pencil is quite hard to see, but I found if you turn the drawing to the light when you cut its easier.
- cut out the features from the black card.
- I used BBQ skewers for my sticks, but toffee apple sticks are best as they don't have a sharp end. If like me you use BBQ skewers which are easier to find, be sure to snip the sharp ends off!
- Glue each disguise to end of a skewer (wait til dry) and voila!
Knowing full well that people will want to continue to play with the accessories we made some extra moustaches to fix onto the drinking straws, and then because the girls were so excited about them we had to make even more to have at the dinner table.
These are great for dinner parties and weddings too, not just for children but for all those childlike moments. They're great ways to break the ice at the dinner table and will certainly get people coming out of their shells... whilst suddenly you'll have Dali, Tom Selleck, Groucho Marx, Fu Manchu and Stalin at the table! Even the camera shy will be posing!
The idea of the photobooth was to add to the party different focal points, like play stations, that would encourage all the guests to take it turns to pose for the camera. My sister had used a similar idea at her wedding nearly 5 years ago and whilst I was still exhausted from lack of sleep after the arrival of my 1st daughter almost 6 weeks before the big day, I was far from the notion of silliness and spent most of the time in a corner breastfeeding. So, now almost 5 years on I am so excited to have created our own!
To make the photo booth I sent my husband to the nearest and biggest white goods electrical shop and requested in the 'baby wants 12 lemons' way (Jennifer Aniston & Vince Vaugn.. in The Break Up) a box used to house a fridge-freezer. Then I set about wallpapering the inside with designers guild wallpaper - I always buy lots in the sale to use as wrapping paper and so have plenty - then I cut scraps of fabric to shape the front and glued them on to add some colour and decoration.
All that's needed when it's finished is a small chair to sit inside and some eager posers, which in our house there are plenty!
To create the booth you'll need:
All that's needed when it's finished is a small chair to sit inside and some eager posers, which in our house there are plenty!
To create the booth you'll need:
- a large cardboard box big enough to sit in or a sheet of heavy duty card to create a frame.
- scissors
- glue
- wallpaper/wrapping paper
- pom poms or other decorations as you see fit.
I think, no, I know, after the party i'm going to keep the booth and the accessories in our hallway for a while and all visitors will have to be captured as they enter or leave. I know it will take some time for the girls to get bored of the idea and they'll both want it in their rooms. They'll use the photo booth to make their own tv programmes and shows too!
so much fun and so simple..... do send in your pictures and we'll create a wall of photos on our blog!
We have more Monday Makery craft & recipe ideas here.
If you would like to share some ideas as a guest blogger on the Monday Makery we would be very excited to hear from you. Use the contact form on our main website here
For behind the scenes photos of Sisters Guild we have the gallery of the A-Z of Sisters Guild here.


This is great! Z's birthday party next month so I'm collecting ideas - this would be great with a pirate theme or hats accessories. Will keep you posted!
ReplyDeleteLOVE this idea! I'll definitely be using it in future. Thank you!
ReplyDeleteYou come up with some brilliant ideas...I will certainly use this one!
ReplyDeleteThis is awesome! I am so inspired by this- the possibilities are endless :)
ReplyDeleteThanks for the review. It will be very useful for those who don’t want to manually configure things.
ReplyDelete