Showing posts with label indoor play. Show all posts

Monday, 11 July 2011

Monday Makery - Photo Booth and Accessories!


We are about to throw a party for Sessi to celebrate her 5th Birthday and in all the preparations that include an entertainer, food, party bags and all the hulabaloo that comes with it, my favourite part is the decorations!
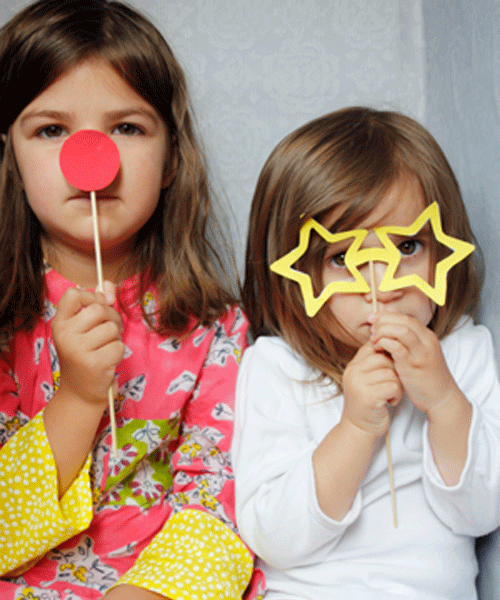
Here we create a photo booth and accessories to capture all her friends in disguise. We know it will cause fits of giggles from all the guests and the photos can be used to make thank you cards later.
I'm going to get my hands on a polaroid camera to snap away and pin all the pictures from the booth onto a board for everyone to see and have an instant memento to take home.


So, first to come up with the accessories and disguises. The simplest way to alter a face is by adding beards, moustaches, glasses, hats and in keeping with the circus theme of the party a clown nose too.


We had so much fun looking at some pretty wacky beards and moustaches and showing pictures of Dame Edna Everidge to Sessi was fun and we recreated said Dame's style of glasses for some instant comical glam.


Here's what you'll need:

  • black card
  • scissors
  • pencil
  • wooden sticks - we used wooden barbeque skewers and snipped the sharp end off.
  • glue
Here's how :
  1. Decide what shapes, disguises and accessories you want to make
  2. Draw them out onto card to create a template and cut each one out, this gave us room for error and perfecting each piece. It's best to fold the card in half and draw one side of the moustache/glasses etc then keep it folded when you cut. This will ensure that there is symmetry.
  3. The trickiest bit is drawing on the black card as pencil is quite hard to see, but I found if you turn the drawing to the light when you cut its easier. 
  4. cut out the features from the black card.
  5. I used BBQ skewers for my sticks, but toffee apple sticks are best as they don't have a sharp end. If like me you use BBQ skewers which are easier to find, be sure to snip the sharp ends off!
  6. Glue each disguise to end of a skewer (wait til dry) and voila!

Knowing full well that people will want to continue to play with the accessories we made some extra moustaches to fix onto the drinking straws, and then because the girls were so excited about them we had to make even more to have at the dinner table.
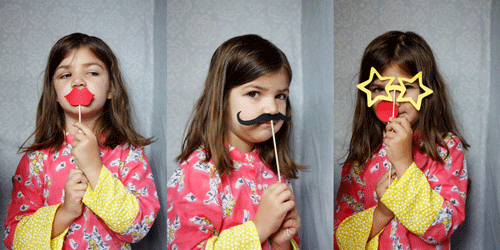

These are great for dinner parties and weddings too, not just for children but for all those childlike moments. They're great ways to break the ice at the dinner table and will certainly get people coming out of their shells... whilst suddenly you'll have Dali, Tom Selleck, Groucho Marx, Fu Manchu and Stalin at the table! Even the camera shy will be posing!


The idea of the photobooth was to add to the party different focal points, like play stations, that would encourage all the guests to take it turns to pose for the camera. My sister had used a similar idea at her wedding nearly 5 years ago and whilst I was still exhausted from lack of sleep after the arrival of my 1st daughter almost 6 weeks before the big day, I was far from the notion of silliness and spent most of the time in a corner breastfeeding. So, now almost 5 years on I am so excited to have created our own!


To make the photo booth I sent my husband to the nearest and biggest white goods electrical shop and requested in the 'baby wants 12 lemons' way (Jennifer Aniston & Vince Vaugn.. in The Break Up)  a box used to house a fridge-freezer. Then I set about wallpapering the inside with designers guild wallpaper - I always buy lots in the sale to use as wrapping paper and so have plenty - then I cut scraps of fabric to shape  the front and glued them on to add some colour and decoration.

All that's needed when it's finished is a small chair to sit inside and some eager posers, which in our house there are plenty!

To create the booth you'll need:
  • a large cardboard box big enough to sit in or a sheet of heavy duty card to create a frame.
  • scissors
  • glue
  • wallpaper/wrapping paper
  • pom poms or other decorations as you see fit.


I think, no, I know, after the party i'm going to keep the booth and the accessories in our hallway for a while and all visitors will have to be captured as they enter or leave. I know it will take some time for the girls to get bored of the idea and they'll both want it in their rooms. They'll use the photo booth to make their own tv programmes and shows too!


so much fun and so simple..... do send in your pictures and we'll create a wall of photos on our blog!


We have more Monday Makery craft & recipe ideas here.
If you would like to share some ideas as a guest blogger on the Monday Makery we would be very excited to hear from you. Use the contact form on our main website here

For behind the scenes photos of Sisters Guild we have the gallery of the A-Z of Sisters Guild here.

Tuesday, 28 June 2011

The Story Behind Our Collections - Miller Goodman

If you already know the Sisters Guild boutique, you'll know how much care and attention goes into bringing our collections together. Our dressing room is filled with wonderful clothes, our decor brings colour, inspiration, sumptuous fabrics and beautiful pieces to adorn your home. The collections brought together in our imagine and play section holds a carefully selected range of pieces that enhance play, encourage creativity and inspire children to imagine. One of our strongest beliefs is that imagination is contagious. There are wonderful and creative ways for children to play that spark the imagination and these amazing blocks are just one of them.


The brilliant Brighton based designers Zoe Miller and Dave Goodman have designed these two sets of imaginative building blocks, building blocks like no other. 


The first of the designs are the ShapeMaker set of 25 colourful, geometric design, hand printed, beautifully crafted, environmentally friendly hardwood blocks.

The blocks are made of rubber wood - a replenishable wood which feels so beautifully smooth in your hands.


The blocks can be excitingly arranged to create a menagerie of thousands of surprising creatures and endless of imaginative, engaging images that guarantee to delight children and adults of all ages. The blocks perfectly illustrate millergoodman’s commitment to combine function with the highest design principles, producing beautiful, sensitive New Classics in the children’s market.

The more recent collection takes the blocks into 3D with even more possibilities for imagination to explore...
PlayShapes is a unique modular set of 74 wooden geometric shapes which you can arrange or stack to make hundreds of 3D creations, such as animals, people, faces, vehicles, buildings and much more. The shapes also make fantastic drawing templates.


Young children will enjoy balancing the head and body shapes to make all sorts of funny creatures. Older children may prefer recreating the inventive 3D structures from the enclosed illustrations, giving them inspiration and confidence to build their own creations. The shapes are also an intriguing and imaginative plaything for adults - we've certainly had hours of fun with them at dinner parties.


Beautifully crafted from environmentally - friendly, durable rubberwood, the shapes feel soft in your hand and the flashes of colour add a modern accent. The set of shapes come in a printed, unbleached cotton drawstring bag along with a set of instructive illustrations.


Miller and Goodman clearly have an understanding of shape and colour which is not ony evident in their shapemakers but also in their books: A is for Artist, Colour, Shape

Produced in collaboration with Ella Doran and Tate UK each book explores its subject with wonderful pictures illustrations and bright colourful imagery. These books have been on our shelves at home read and reread, explored and brought to my girls an understanding of shape, colour and form.


Now my girls can explore shape, colour and form with the playshapes. And we've had to grab an extra set of the playshapes now too beacuse as soon as they're tipped out everyone in the room wants to play. The coffee table is shoved to the end of the room and the floor becomes a busy area of imaginative creations.

One of the things I love about the playshapes is that each time we play everyone creates and discovers something new, a new creature, person, scene, tower, village it is literally endless. There is even a flickr site dedicated to all the creations people have made.

Completely addictive, utterly brilliant, intriguing and imaginative the miller goodman blocks are a must for children and adults of all ages - they really are set to be an enduring design classic.

We're not alone in thinking these are genious. Miller Goodman won the gold award at the 2009 Practical Pre-School awards. Miller and Goodman say:

"We are very proud to have received a gold award for ShapeMaker with a score from the judges of 94% at the 2009 Practical Pre-School awards. This is our first industry toy award."


We believe imagination is contagious and these miller goodman shapes and blocks are a perfect example of how far your imagination can take you!

Take a look at the Flickr groups for Shapemaker and Playshapes
Discover Miller Goodman here and get creative too

If you'd like a further visual treat take a look at Zoe Miller and Dave Goodman's site Silence - their consultancy which helps creatives explore their ideas through still and moving image reference. Amazing.


This is part of our series of blog posts about the Story Behind our Collections - why we've chosen the designers that are in the boutique and how those designers came to be.

To see a bit more of what Sisters Guild is all about take a look at the A-Z of Sisters Guild here.

Sign up to find out more about future collections, news and offers:

Friday, 24 June 2011

An A-Z of Sisters Guild: Q is for Quirky

quirk  (kwûrk)
n.
1. A peculiarity of behavior; an idiosyncrasy:
"Every man had his own quirks and twists" (Harriet Beecher Stowe).
2. An unpredictable or unaccountable act or event; a vagary: a quirk of fate.
3. A sudden sharp turn or twist.
4. An equivocation; a quibble.
5. Architecture A lengthwise groove on a molding between the convex upper part and the soffit.
[Origin unknown.]
quirki·ly adv.
quirki·ness n.
quirky adj.

This is part of our 'An A-Z of Sisters Guild published every Friday. See also A is for adventure, B is for bedtime, C is for colour, D is for discovery, E is for exuberance, F is for Feminine, G is for glorious, H is for home , I is for imaginative , J is for Joie de Vivre, K is for kin  ,L is for Love , M is for Maternal , N is for Nurture  O is for Oneiric and P is for Play

We also publish other series in our blog including our Monday Makery, Tuesday brings 'The  Story Behind Our Collections' inviting you to take a closer look at the designers we house and why we chose them for the Sisters Guild boutique.  Wednesday we show you our favourite seasonal pieces and Thursdays is dedicated to the 'Art of Living' in which we share ideas and inspiration from places to visit, things to see and articles about things that enrich our lives.

Monday, 30 May 2011

Monday Makery - Bean Bag Toss

I love this game quite simply because it’s simple. Children of all ages love to play it and because there are so many different ways to play and different ways to use the beanbags it can give hours of fun for little children.

Children can play traditional aiming games; trying to accurately throw the beanbags into a hole in a box as we've made here. Playing a game of trying to knock down a group of bears and soldiers, using them as pillows and beds for favourite cuddlies, stacking them into towers and use them in counting games. Another great thing about this is that they are so easily taken with you in the park or in the garden. Perhaps the best thing of all is that they are very easy to make.


You'll need:
  • fabric
  • scissors
  • needle and thread or a sewing machine if you have one
  • dried beans, lentils or munga beans
  • kitchen scales
Here's how:
  1. Cut your fabric into 6 inch squares.
  2. Take two of the squares and face together right side to right side.
  3. Sew the two sides together leaving a little over an inch gap so that you can fill the bags later.
  4. Turn the bag inside out. You can use the point of a pencil or a chopstick to push out the corners. 
  5. Fill the bean bag with your dried beans. I used 10oz but you can use less or more if you feel you need to. I didn't have a funnel to fill the bags so I used a rolled up piece of paper as a makeshift funnel and it did the job just fine.
  6. Once the bag is full you're ready to sew together the last little inch gap. All done!
I made six in total so there were 3 bags for each player.


We also made some animals from cardboard boxes as part of a game; aiming at the animals and trying to get our beanbags to land inside.


My last box was commandeered for a post box and so the girls set about painting it bright red and marking out the slot for the letters. I cut a hole in the back, marking out three sides to make a flap so that the 'post' could be collected.


We made another game using the post-box and a list of words that Sessi is currently learning to read. I cut out the various words and attached a paper clip to each one. Then using a fishing rod with a magnet attached we played our own version of go fish. We fished for a word and tried to read it if we could read the word we kept it in our pile and if we couldn't the word was put back into the mix and the player had to shout 'go fish!'. The player with the most cards wins.

Oona will post just about everything in the post-box and I know when it’s emptied I'll find some interesting things in there!

I also upcylced some milk cartons and turned them into skittles. I poured a little of our left over dried beans and lentils into each carton after giving them a good rinse and letting them dry. I then painted them with the left over paint from our animal boxes and assigned each one a number.
The girls used the bean bags to try and bowl them down. We had a hard time teaching Oona the rules who insisted she stand right next to them and threw from there but it was great fun.


The girls have been inventing other games too; seeing how many bean bags they can throw into a hula hoop and scoring points for how many landed inside, balancing the bags on their heads and seeing how many they can carry before they fall down. Oona has her own little games that she has pilfered the bean bags for and has made beds for her mice and little dolls, she likes to line them up and count them, though the 4 is always missing, apparently on holiday according to Sessi! Oona will make towers with them too and I’m quite amazed how adaptable to so many games these bean bags have become!....Oh and yes they do occasionally end up in our post box too.

We have more Monday Makery craft & recipe ideas here.

For behind the scenes photos of Sisters Guild we have the gallery of the A-Z of Sisters Guild here.