Showing posts with label dressing up box. Show all posts

Thursday, 27 April 2017

If Walls Could Talk - Tutu Du Monde April 17 Collection


If walls could talk 

April 17


Take a step into the wonderful world created by Tutu du Monde. With pieces inspired by classical ballets such as the Swan Queen tutu, the collections house delicate masterpieces that embody the prima ballerina; a celebrated heroine that is the epitome of elegance and grace. 
Diamond sparkles, glitter, vintage beads and feathers and carefully strewn jewels that look like dewdrops caught in a web all flutter together in this collection of dresses, capes and accessories intricately and delicately created. 

Perfectly suitable to wear at a wedding, a birthday celebration or to the everyday wonderland that is childhood. There's something here for every girl of every age with dreams of their own. A carefully curated capsule of a world that lets the dreamer take their dreams in hand. Each dress is an heirloom piece to be tucked away in a treasure box for yearas to come. 

Take a look at teh full collection here 


xx


SaveSave

Friday, 26 April 2013

Where Will You Go Today?


with 25% OFF the Dressing Up Box where will your imagination take you today? 
 

A tea party with garden fairies, a forest where all the wild things are, a ship set sail to a land where monkeys rule and music plays or join the circus and be back in time for supper! The dressing up box awaits with a magical 25% OFF everything inside. An invitation to furnish your imaginings; discovering animal masks and capes, tutu's, caplets, treasure chest capes, sparkling centre stage onesies and much more as dreams become play and you enter a world of make believe. 

Jump in to your world of wonder here
offer ends *02.05.13 - Thursday 2nd May 2013
enter code 'BECOME' at the checkout


pic source: top left image 'events by shelbi rene' all others sisters guild


Monday, 4 June 2012

Monday Makery - Cardboard Crowns


Time to turn to the understated of craft materials, the sometimes binoculars, sometimes towers of a castle, sometimes people, sometimes tunnels for cars and occasionally easy to make goodie boxes for gifts: the champion of craft materials in any childhood: the toilet roll. We raided the recycling bin, found two so then removed some from the inside of unused rolls to make some party crowns in honour of the jubilee weekend.
These party crown would make great party hats or great accessories to add to the dressing up box or just fill a rainy afternoon with busy hands and imagination, oh, and they're easy to make too.
You can paint them, cover them with newspaper, fabric scraps or as we did here pieces of felt, ric-rac and ribbon.

Here's what you'll need:
  • cardboard rolls - toilet paper rolls or kitchen roll tubes
  • covering - newspaper / fabric / paint
  • elastic
  • glue - fabric glue for fabric or PVA for paper
  • scissors


Here's how

  1. Cover the tube with glue and stick your fabric or newspaper around it.
  2. decorate with ribbons, ric-rac, string - whatever you fancy or fits the occasion: numbers for birthdays, names for party games and guests.
  3. Cut the crown points, don't worry about them being exactly even.
  4. Cut a hole about 1/4 of an inch from the bottom on either side of the tube.
  5. Feed through a piece of elastic to one side and tie a knot on the inside. Feed through the other end of the elastic tying another knot on the inside.
  6. That's it. Now you're ready to be crowned.

If only getting the girls to sit long enough to take a picture was as easy for them as making the crowns!


Happy Making


This is part of our weekly Monday Makery where we bring you a recipe to bake or a craft to create. Visit our Monday Makery when you're in need of inspiration for something to do on a rainy day or to use as interception of the words 'I'm bored', or just because being creative with your children is something you all love to do. Our other popular blogposts include 'The story behind our collections', 'Tell us its Tuesday' , An A-Z of Sisters Guild, The Art of Living posts bring you all the things we are passionate about and the things we discover in our lives as mamas, and our 'Once upon a week' gives you a glimpse into life behind the scenes at Sisters Guild. 

www.sistersguild.co.uk

Sign up for future news and offers:

Wednesday, 23 November 2011

Wednesday Woo: Dressing Up Box


When we were little Christmas always involved getting dressed up in costumes and putting on a play.  Invariably, there would be a central theme of the Baby Cheesus (played by whoever was the baby cousin at the time) and then veering off on all sorts of tangents influenced by whatever oufits, wigs, hats and props we could find.  Plus some heartfelt singing and recorder playing.  I recall one Christmas when the oldest cousin Tamarose was the 'Director' and I was dressed in a flying jacket and goggles with a hip flask and vacuum cleaner as a prop - I can't remember the storyline but I do remember the grown-ups laughing a lot.  Later we inherited some real theatre costumes from our Grandpa Hector who was a stage actor - amongst the costumes was a silk Pierrot outfit and a Robin Hood outfit which were amazing.  It resulted in some very curious stories, as well as squabbles over who got to be the Pierrot! 

Anyhow, my mind turns to the cousins of now and how the eldest Sophia is definitely the Playwright and would make an excellent one if she ever chose that career path.  I just don't know how she'll get the mischievous Gabe & Oona to co-operate in the Christmas play.  But there is a fantastic dressing up box at Granny's (with thanks to our brother Adam).  We look forward to seeing what they come up with - and we'll try and get some pics for you!

If you need some bits to add to your dressing up box, we have a a growing collection of capes and masks and tutus here - a great combination for some fun stories!


This is part of our Wednesday Woo blog post series where we present a selection of our favourite things from the Sisters Guild Boutique.

We also have a Monday Makery with ideas for things to make yourself.

The Art of Living posts bring you all the things we are passionate about and the things we discover in our lives as mamas.

www.sistersguild.co.uk

Sign up for future news & offers:

Monday, 11 July 2011

Monday Makery - Photo Booth and Accessories!


We are about to throw a party for Sessi to celebrate her 5th Birthday and in all the preparations that include an entertainer, food, party bags and all the hulabaloo that comes with it, my favourite part is the decorations!
Here we create a photo booth and accessories to capture all her friends in disguise. We know it will cause fits of giggles from all the guests and the photos can be used to make thank you cards later.
I'm going to get my hands on a polaroid camera to snap away and pin all the pictures from the booth onto a board for everyone to see and have an instant memento to take home.


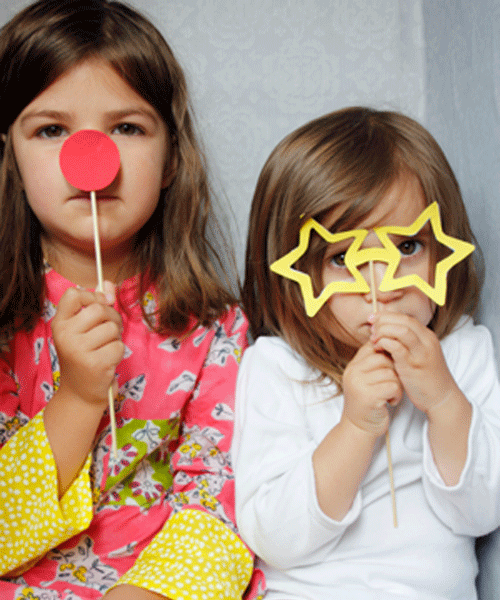
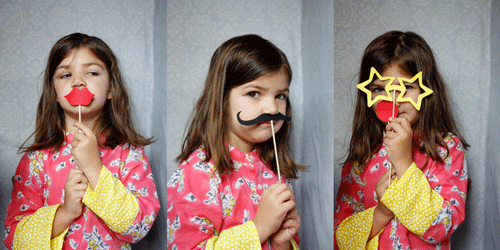
So, first to come up with the accessories and disguises. The simplest way to alter a face is by adding beards, moustaches, glasses, hats and in keeping with the circus theme of the party a clown nose too.


We had so much fun looking at some pretty wacky beards and moustaches and showing pictures of Dame Edna Everidge to Sessi was fun and we recreated said Dame's style of glasses for some instant comical glam.


Here's what you'll need:

  • black card
  • scissors
  • pencil
  • wooden sticks - we used wooden barbeque skewers and snipped the sharp end off.
  • glue
Here's how :
  1. Decide what shapes, disguises and accessories you want to make
  2. Draw them out onto card to create a template and cut each one out, this gave us room for error and perfecting each piece. It's best to fold the card in half and draw one side of the moustache/glasses etc then keep it folded when you cut. This will ensure that there is symmetry.
  3. The trickiest bit is drawing on the black card as pencil is quite hard to see, but I found if you turn the drawing to the light when you cut its easier. 
  4. cut out the features from the black card.
  5. I used BBQ skewers for my sticks, but toffee apple sticks are best as they don't have a sharp end. If like me you use BBQ skewers which are easier to find, be sure to snip the sharp ends off!
  6. Glue each disguise to end of a skewer (wait til dry) and voila!

Knowing full well that people will want to continue to play with the accessories we made some extra moustaches to fix onto the drinking straws, and then because the girls were so excited about them we had to make even more to have at the dinner table.


These are great for dinner parties and weddings too, not just for children but for all those childlike moments. They're great ways to break the ice at the dinner table and will certainly get people coming out of their shells... whilst suddenly you'll have Dali, Tom Selleck, Groucho Marx, Fu Manchu and Stalin at the table! Even the camera shy will be posing!


The idea of the photobooth was to add to the party different focal points, like play stations, that would encourage all the guests to take it turns to pose for the camera. My sister had used a similar idea at her wedding nearly 5 years ago and whilst I was still exhausted from lack of sleep after the arrival of my 1st daughter almost 6 weeks before the big day, I was far from the notion of silliness and spent most of the time in a corner breastfeeding. So, now almost 5 years on I am so excited to have created our own!


To make the photo booth I sent my husband to the nearest and biggest white goods electrical shop and requested in the 'baby wants 12 lemons' way (Jennifer Aniston & Vince Vaugn.. in The Break Up)  a box used to house a fridge-freezer. Then I set about wallpapering the inside with designers guild wallpaper - I always buy lots in the sale to use as wrapping paper and so have plenty - then I cut scraps of fabric to shape  the front and glued them on to add some colour and decoration.

All that's needed when it's finished is a small chair to sit inside and some eager posers, which in our house there are plenty!

To create the booth you'll need:
  • a large cardboard box big enough to sit in or a sheet of heavy duty card to create a frame.
  • scissors
  • glue
  • wallpaper/wrapping paper
  • pom poms or other decorations as you see fit.


I think, no, I know, after the party i'm going to keep the booth and the accessories in our hallway for a while and all visitors will have to be captured as they enter or leave. I know it will take some time for the girls to get bored of the idea and they'll both want it in their rooms. They'll use the photo booth to make their own tv programmes and shows too!


so much fun and so simple..... do send in your pictures and we'll create a wall of photos on our blog!


We have more Monday Makery craft & recipe ideas here.
If you would like to share some ideas as a guest blogger on the Monday Makery we would be very excited to hear from you. Use the contact form on our main website here

For behind the scenes photos of Sisters Guild we have the gallery of the A-Z of Sisters Guild here.
Monday, 20 June 2011

Monday Makery - Pillowcase Wings


Ok, this is one for us grown ups! This all started with a white wraparound cotton cardi that Sessi wasn't showing any interest in wearing. I sewed two ribbon loops onto the cuffs and suddenly it was transformed into a pair of wings, becoming a favourite thing to wear over dresses and t-shirts. The idea has been in my mind now to make her some fabric wings as an alternative to the wire ones, that get bashed and knocked about whilst playing and quite often get taken off in frustration. I wanted some wings that made Sessi feel as though she really could fly.  The technique is one I have seen on this blog here using various fabric layers to create plumes. The basic idea can be adapted to create different styles, colours and bug wings too which are great for boys who aren't interested in being fairies or birds but still want to fly! These are sure to become the favourite pieces in our dressing up box.


You'll need:
  • Card
  • Pencil
  • measuring tape
  • ruler
  • scissors
  • fabric
  • string
  • elastic
  • ribbon
  • and either fabric glue or a needle and thread or a sewing machine. The ones I made here I used fabric glue for as it seemed a far quicker option than pinning and sewing. (always the path of least resistance)


here's how:

  1. I first measured Sessi's wingspan -  the length from one wrist to the other across her shoulders, and then the 'drop' for the length of the inner side of the wing
  2. Dividing the wingspan into 2 and adding an inch for looseless and a little room for growth I drew a template onto card and cut it out. I first measured the top 17" then the drop 21"and using a pencil  tied to string drew a curved line between the two. The curved line stopped short of the length I wanted but it was a good guideline to have in place. You will only need one template as you can flip it over for the other side.
  3. I then decided on the length and width for each plume and drew a template for a small row cutting it ready for measuring and cutting the fabric.


4. I discovered that each wing fits perfectly onto a pillowcase side so found an old pillowcase that would have ended up in charity - which is where I will be looking for the next fabric.


5. I drew around the stencil of each wing with pencil onto the pillow case and cut it out using pinking shears to prevent any fraying. It also gave the wings a beautiful textured edge.

6. Then having chosen my fabric for the plumes - I raided the offcuts in the haberdashery department. I cut out the plumes using the card template. Some in rows and some single ones too.

7. I layered each plume onto the fabric using fabric glue to stick them on; starting from the bottom and working my way up to the top. Cutting the edges that overlapped as I went. It's a bit like a making a fabric collage.


    8. I stitched the wings together at the top about an inch of stitching down towards the bottom.
    9. Then I measured the elastic to make a loop around the wrist and sewed it to the top edges of the wings. A loop each side.
    10. To prevent the wings from drooping at the back I measured some ribbon to tie around the shoulders. I folded the ribbon in half and stitched the centre of the ribbon to the central part of the back of the wings. I think the ribbon adds a nice touch too.
 ....and there you have it, beautiful fabric wings so you can soar to your hearts content.


It might sound like a long project but it was super easy so don't be put off by the 10 steps! You'll be surprised too as to how easy you can obtain all the things you'll need.


I'm now making a bug pair for Gabriel and a pair with shades of white with thinner longer plumes like feathers of a dove for Oona.


I'm utterly in love with them and i'm sure they'll get lots of play. Great too for all those childrens party costumes. Also lots of my friends are already wanting them too so i'll be making some for birthday gifts no doubt. Its seeing the movement of the wings that is so beautiful especially in the breeze of a summers day.


After a day of flying in the tropical gardens of Battersea park it was time to go home.


I wonder where we'll fly tomorrow?